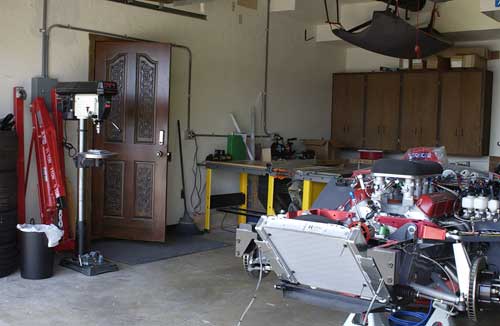
June 2002

Scott is back home from school and we're finally getting back to work on the car. We did make a little progress over the winter when I was working by myself, with my father (when he came for a short visit), and when Scott was home for vacations. But for the most part, the car sat lonely in the garage.

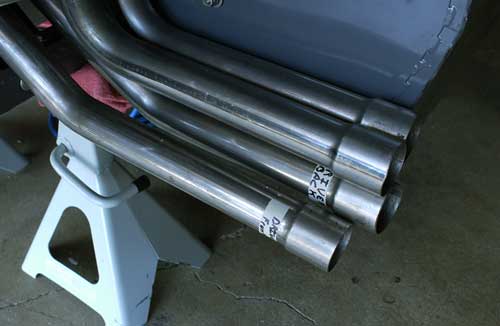
We received the new headers from JBL back in October and attempted to install them. While they fit better than the first batch, they still did not provide adequate clearance. The driver's side headers barely cleared the chassis and the passenger side ones wouldn't even go in.  

We should point out that the block and heads we are using are not those typically recommended by JBL. Both the Canfield heads and the Sportsman 351W block are wider than a standard block and heads which meant there was less clearance between the heads and chassis. JBL was nice enough to take our original headers back and get their header supplier to attempt to make custom headers for us to get them to fit

  We also found the headers on the driver's side did not line up properly to go into the side pipes. We could probably have bent these into shape, but the chassis interference problems ruled out the use of these headers anyway. And it's quite probable that some of this misalignment is because the headers on this side were still interfering with chassis a little.

We ultimately decided that trying to solve this problem via email/phone was not going to work, so we'll find a local header shop to make a set of headers for us (or modify the ones we have) when we get everything else done.

Our first step of the summer was to clean out the garage and organize all our tools. This actually took most of a day since we had been piling stuff in the garage all winter.  
We've spent much of the month (at least the time when we weren't traveling) working on the dash and electrical system. Over the winter, I had drilled out the gauge holes in the fiberglass dash we got from JBL. We then glued 3/16" closed-cell foam to the surface on the left and right sides and then covered it with red leather. The custom machined aluminum panel was then bolted to the fiberglass. All the gauges and switches fit into the aluminum panel and through the holes in the fiberglass.
We used a piece of 1/8" x 1" aluminum wrapped in leather along the bottom of the dash. After gluing the leather to the top of the aluminum, we bolted the strip to the bottom lip of the fiberglass, then wrapped the leather around and glued it in place.  
  The finished dash looks very sweet and is pretty close to the digital image mockup we created last summer. Scott also wired up the headlights (including the dimmer controller) and the horn to check out the electrical system.
We also received the parts we needed to finish the anti-roll bars. You may recall the the JBL has cockpit adjustable anti-roll bars. A linear actuator is used to rotate knife blades on the bars. Depending on the orientation of the knife blades, the anti-roll bars will be firm or soft or anything in between. Switches on the dash control the position of the linear actuators independently front and rear. A series of five LEDs on the dash provide a visual indication of the setting.  

Next Month - electrical wiring, plumbing, and our very cool throttle controller (electronic drive-by-wire system).