|
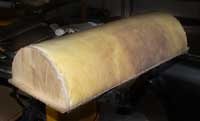
Diffusor Construction The diffusors are designed as a half-cylinder that is screwed into the wall. A half-cylinder provides good one-dimensional diffusion properties. It is not quite as good as a reflective phase-grating diffusor such as those popularized by RPG, but still works much better than a flat wall. By aligning some of the diffusors horizontally and some vertically, the diffusion will become more 2-dimensional. In the bass frequencies, these diffusors provide more absorption. Why they are not terribly efficient absorbers, if enough of them are used good low frequency dampening can be provided. The diffusors are constructed using dense fiberglass insulation shaped in a half-cylinder. The back, top, and bottom are sealed with 1/2" plywood. The outer surface of the diffusor is covered with vinyl. When mid- and high-frequency sound waves hit the diffusor, they are reflected by the vinyl wrap (in different directions depending on where on the diffusor surface they hit). Lower frequency sound waves pass through the vinyl and energy is dissipated in the fiberglass. This kind of diffusor/bass trap was popularized by ASC with their "Tube Trap". In the standard tube trap, a full cylinder is used which is only partly covered with an acoustically reflective covering. This allows the user to select between high frequency absorption and diffusion based on the orientation of the cylinder.
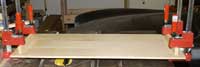
Start construction by cutting plywood into a rectangle for the back. I made my 15" x 38 1/2" so that I had tabs at each end to screw the diffusor into the wall. I glued a small piece of 1x2 at each end to help support the end caps.
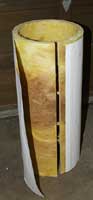
through on one side and slit on the inside on the other. I first removed the vapor barrier wrapping and then opened up the insulation tube a little. Using a carpet knife, I followed the inside slit to cut all the way through the fiberglass. Note - whenever working with fiberglass insulation, make sure to wear long pants and shirt, a dust mask, and gloves to prevent fiberglass fibers and dust from getting into your skin and lungs.
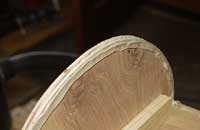
adhesive on subsequent units). Liquid Nails is available in 10oz cylinders (similar to caulking) for much than the smaller tubes. I used about 4 oz of adhesive for each one. Once the adhesive is in place, slide the fiberglass half-cylinder in place, making sure it contacts the wood in all locations. If there is a gap that cannot be closed, slide a little fiberglass batting with more adhesive into the gap. I noticed that some of the fiberglass cylinders were a little shorter than others (mostly due to tamping of the ends in storage and transit). I made my end caps a little closer together than the specified length of the tubes which meant that I had to trim some of the fiberglass to make them fit in some cases.
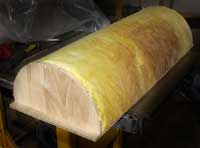
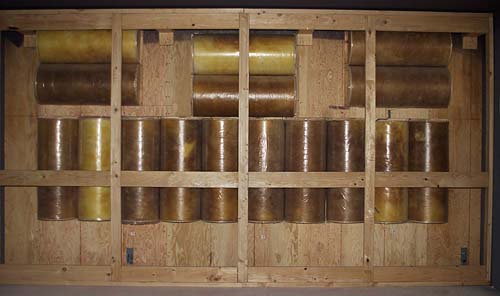
The vinyl is secured in place using a staple gun. It does not have to be air tight. Once I got the hang of it, each diffusor took me 1 to 1 1/2 hours to make, and as I mentioned above, cost me less than $30 in supplies. Keep in mind that you will need to use a lot of these to provide any significant bass absorption. I haven't tested these diffusors individually and I have yet to perform an acoustical test on the room (which I plan to do), but I can estimate the absorption coefficients based on similar products that have been tested. The table below indicates the ESTIMATED absorption PER DIFFUSOR UNIT (divide by 3.75 to get absorption per square foot).
|