| UPDATE - I sold the house with this theater in early
2002. I am currently in the process of building a new custom home with a
new theater.
My home theater was created by combining a small bedroom and an adjacent storage room. The resulting room was still quite small (10ft x 15ft with a 7ft by 4ft alcove in the back) but I was able to create a great (although cozy) home theater.
This page talks about the design issues for equipment, acoustics, electrical, ventilation and storage. Click on any of the images to see a larger view. RoomAs mentioned above, my theater room was created by knocking out the wall
between a small bedroom and an adjacent storage room. I then covered over the
outside window and the cement walls in the storage room with drywall on studs.
Since the theater abutted another bedroom, I added a second set of interleaved
studs to mount the dry wall on for this wall so that sound could not travel
through the studs. This provides adequate isolation to watch a movie at moderate
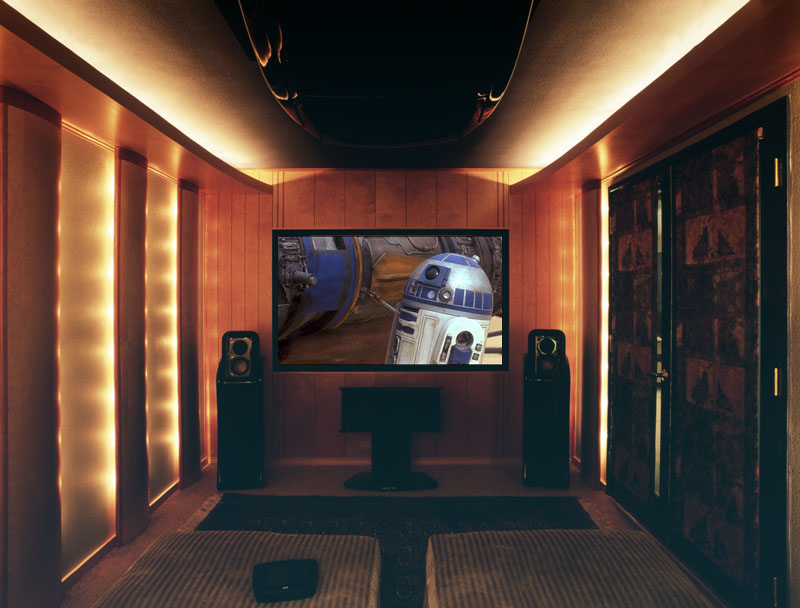
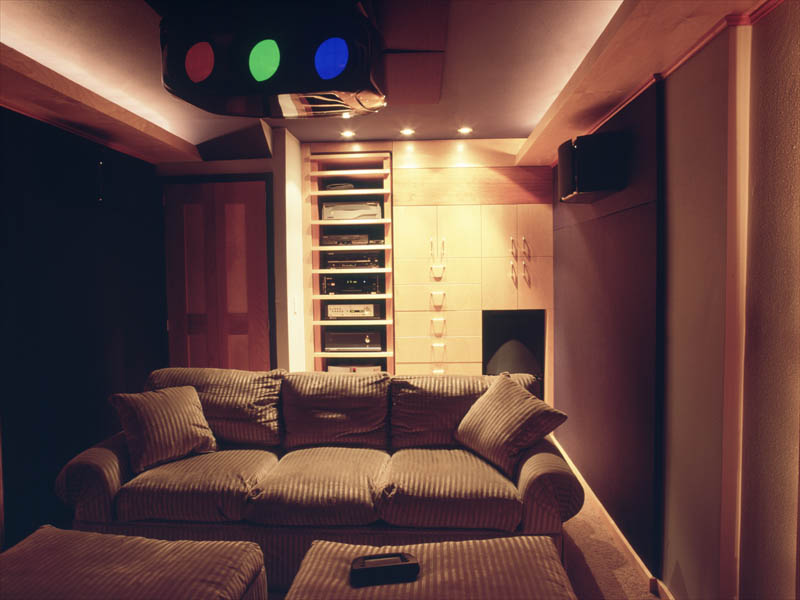
levels without disturbing the occupant of the bedroom. The resulting room dimensions turned out to be terrible acoustically since the length was almost exactly twice the width. To overcome this problem, I built cabinets across the full width of the room in both the front and back. This reduced the effective length of the room so that room modes were not overlapping. I put in a double french door on the side to allow large equipment and furniture to be moved into the room. The doors have thickly padded Roman shades to block out light and reduce sound reflection off the glass. The room is painted a neutral grey with just a hint of blue on the walls, and a dark grey-blue on the ceiling. Cloth covered acoustic panels are mounted to the side walls in the back half of the theater and on the ceiling around the projector. The floor is carpet covered cement slab with a thick pad. AcousticsI've been in many home theaters with terrible acoustics. The natural tendency by home theater installers is to over-dampen the room with lots of acoustic treatment. Not only is this not necessary, it tends to make the room sound lifeless and flat. To improve the acoustics in my room, I worked with an George Hallowell, an architect that specializes in acoustics. I can also recommend a book, The Master Handbook of Acoustics by Everest. There are typically three acoustic issues in a room that can benefit from treatment. These are, in order of importance:
There are many cases where it is not practical to add acoustic treatment to your room. I am not a believer in adding acoustic treatment if it detracts significantly from the aesthetic of the room. I've seen rooms plastered with tube traps in an attempt to provide an optimal acoustic environment. If this is what you want, go for it, but excellent sound can be achieved without this kind of visually obvious room modification. In fact, most rooms in the typical home can me made to sound pretty good just by optimal placement of the speakers (particularly the subwoofer) and the listening position. Bass ResonanceBass resonance is probably the nastiest problem that the home theater and music enthusiast must deal with. Many rooms in typical homes are rectangular and have flat ceilings (parallel to the floor). This will result in amplification or attenuation of certain bass frequencies (where the wavelength is an even multiple of the room dimension) resulting in "one note" bass or some bass frequencies sounding significantly louder than others. The worst situation is when multiple room dimensions are the same or even multiples of each other. Rooms with sloped ceilings and angled walls can reduce or eliminate this problem, but can also result in reduced imaging specificity. As originally built, my room had some pretty severe bass resonance problems. The length of the room was almost exactly twice the height, which was pretty close to the width. I was able to significantly reduce the bass resonance problem by reducing the length of the room by adding the built in cabinets in the rear of the room (which went floor to ceiling and wall to wall) and a built in cabinet in the front of the room around the screen. The cabinet in the front is actually a bass trap. It contains tuned chambers (with slits in the cabinet) filled with fiberglass insulation that absorb bass energy at the resonance frequencies of the room. The end result is reasonably smooth bass energy in the room, and particularly at the seating position. Reverb TimeThe reverb time is the time it takes the acoustic energy in the room to fall by 60db (in other words, become inaudible) from the original sound source. A room with too short a reverb time will sound very dry and lifeless. One that has too long a reverb time will make dialog unintelligible and reduce the spatial cues in music. The optimal reverb time is somewhat a matter of personal taste and is dependent on the room size. But it is generally accepted (by whom, I'm not sure) that a reverb time between 0.3 sec and 0.4 sec is ideal for home theaters and music rooms. A larger room should have a slightly longer reverb time to sound natural than a smaller room. A good way to empirically determine reverb time is to clap your hands in the room. If it sounds completely dead (like it does outdoors, it's too short. If he hear an echo (like it sounds in your garage), it's too long. The clap should sound alive with a little air. Most rooms in typical homes built using 2x4 studs and dry wall, with a carpeted floor and padded furniture will have a reverb time in this range. If you have a lot of glass, hard furniture, or hardwood floors, your reverb time may be too long and you'll probably want to add some additional acoustic absorption. With carpeted floors and a heavily padded sofa and ottomans, the reverb time in my theater was ideal without any additional treatment. ReflectionsSound reflecting off of walls and other objects in the room can reduce detail and imaging specificity. Sound reflections fall into two categories - those that can be distinguished from the original sound and those that can't. Sounds that occur more than 10ms apart can generally be distinguished as separate sounds. Since sound travels at roughly 1100 ft per second, a reflection from a wall that adds 11 ft to the travel distance will fall into this first category. Shorter delays will fall into the second category. Reflections that can't be distinguished are generally the most harmful to the imaging. This is because these reflections confuse the brain's ability to determine spatial cues from the difference in arrival time to your two ears. The closer in time the reflection is to the original sound, the worse the problem. This is why refraction off the edge of a speaker cabinet can be so damaging to a speakers ability to image well. Longer delayed reflections can actually be helpful to creating a sense of airiness to the sound as long as the reflections are not high in energy compared to the original. In most rooms, these reflections will be fairly diffuse once they reach your ears. But if your seating location is 5-6 feet from the back wall and the back wall is smooth, you may want to consider adding some diffusers (or even some book shelves) to this wall to help reduce the strength of direction reflections. I did not worry about short reflections off the side or rear walls. Absorption panels on these walls would have reduced the energy of the short reflections, but at the expense of reducing the reverberation time and making the room sound too dead. But even though the speakers are relatively close to these walls, I have satisfactory imaging and excellent sound in every other way. I did decide to use diffusion panels (RPG BAD Panels) on the side wall just below the rear speakers. This reduces the direct reflections from the opposite wall speakers, resulting in improved directional cues from the rear effects channels. Equipment
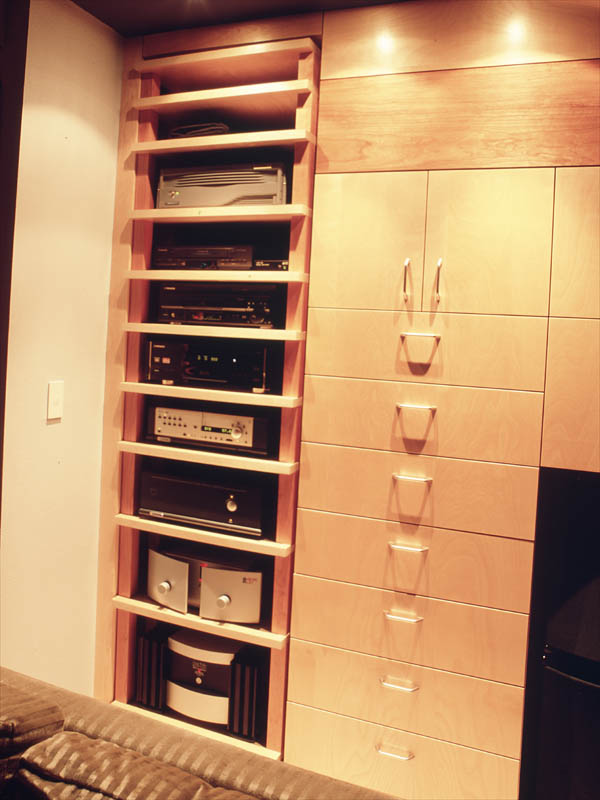
All components and cables have their own characteristic sound. It's critical to listen to complete systems before you make your purchase selection if you expect to be satisfied with the results. A component that sounds great in one system may deliver very different results when connected to completely different components. For my home theater, I elected to use electronics made by Madrigal. This is a first class company that makes excellent sounding products and that stands behind their gear. In my opinion, the sound quality of their products has improved significantly in the last two generations of products. Prior to the 33x series amplifiers, there electronics sounded too thin and lacked the dynamic impact of electronics from Krell and others. The latest Madrigal electronics are excellent. The equipment I currently have in my home theater includes: Sources
Audio
Video
Screen SizeBigger is not always better. I've seen many home theaters which use monstrous screens and have images that are so dark that all the impact of a home theater is lost. A relatively low gain, smaller size screen can deliver a much more satisfying picture than a huge screen - improved sharpness, brighter image, and better uniformity.. ControlOne of the frustrations of owning a sophisticated home theater is the complexity of controlling it. While I understand how everything works, I still hate trying to find the one remote (out of six) that I need to change a particular setting. Explaining how the system works and how to control it to the rest of my family is not a pleasant experience.
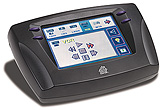
So far, I've been able to setup the Phast controller to control the DVD player, laserdisk player, VCR, Proceed AVP, the projector, the screen, and the room lighting. The Proceed is still being controlled by IR, however, since I haven't been able to get the Phastlink controller in the Proceed to work yet. The one major component that is not yet controlled by the Phast controller is the Snell and Wilcox Interpolator. With the current software, this can only be controlled with a PC using an on-screen interface. This is not a huge problem since the controls can be configured very simply (with on screen buttons for 4:3, letterboxed wide screen, and anamorphic 16:9) and a wireless mouse can be used to click the buttons. Snell and Wilcox promises an update soon that will allow the system to be controlled by the Phast. Unfortunately though, "Snell and Wilcox time" is the opposite of "Internet time" so it may be a while before I see this actually working. The Viewpoint LCD controller works reasonably well. It contains rechargeable batteries that last a week or so before needing to be recharged. A battery level meter makes it obvious when it needs to be plugged in. The screen is very bright and easy to read. Touching the screen or one of the four programmable buttons causes the screen to light up. It stays that way for about 30 seconds unless touched again then switches back off. The controller/system does have a few quirks. Probably the most annoying is that there is a time lag from the time a button is pushed on the LCD until the device actually responds. This is not too inconvenient except for the chapter back button. With this button, the first button push is supposed to bring you to the beginning of the current chapter and the second push is supposed to go back a chapter. With the Viewpoint, it is hard to get both button pushes fast enough so that the player has not already started playing the chapter before the second push. This results in the player just going to the beginning of the same chapter over and over. The other quirk is that the four programmable push buttons cause the LCD screen to light up with the corresponding 30 seconds before it switches itself off. I have two of these buttons programmed for volume up and down. It would be nice if I could adjust the volume without the LCD screen lighting up the room. Cabinets
|
 So, when building my current theater, I decided to invest in a more
sophisticated control system in an attempt to unify all control (at least the
common controls) into a single, simple to use remote. I selected the Phast
system, from
So, when building my current theater, I decided to invest in a more
sophisticated control system in an attempt to unify all control (at least the
common controls) into a single, simple to use remote. I selected the Phast
system, from 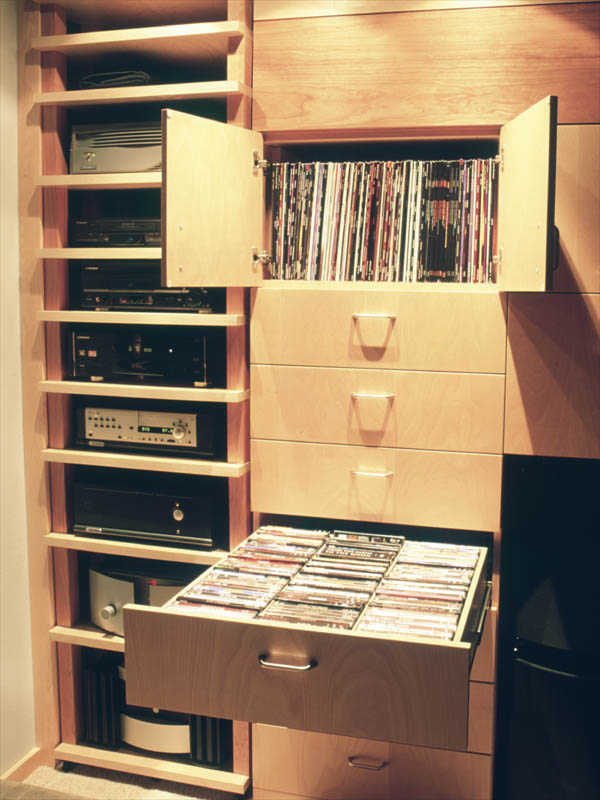
| Levinson amplifier | |
| Proceed amplifier | |
| Revel amplifier | |
| Surround processor and all source components | |
| Video projector | |
| Video processor | |
| Computer and Phast controller | |
| Lighting |
All the circuits are from the same phase from the 220 coming in to the house to minimize ground loop problems. The video projector and the source components are plugged into separate Audio Power power line conditioners, primarily to protect against damage due to power spikes, but also to reduce interference from power line noise.
Lighting
I used low voltage lighting throughout the room. The lights in the ceiling soffits and behind the wall panels are micro-track lights with replaceable bulbs. These lights are all controlled by one lighting controller. Another lighting controller is used to control three ceiling mounted cans in the back of the room which provide illumination for the equipment and media.
The two lighting controllers are controlled by the Phast system (described above). This system allows preset lighting "scenes" which are essentially dimmer presets. I have the system configured with four scenes - all off; an "intermission" scene that has the front (soffit and wall panel) lights at 50% and the back (ceiling cans) lights at 25% (these lights are brighter when turned on full); a "back" scene which I used to change media which has the back lights at 75% and the front lights at 25%; and full on.
I have a switches near the door and near the equipment rack which allow these scenes to be selected. In addition, the LCD remote can be used to adjust lighting. In addition to a specific lighting function on the remote, the lights will automatically turn off when PLAY is selected, and automatically switch to the intermission scene when PAUSE is selected.
Ventilation
The biggest unanticipated problem I ran into was ventilation. This equipment generates a lot of heat. I had assumed I could deal with this by simply adding ducting into the room. This worked OK in the summer time as long as the air conditioning was on. When it turned off, the room warmed up quickly.
As we got later in the year and the air conditioning never switched on, this become a bigger problem. So I added an exhaust fan to suck hot air from behind the equipment rack out of the room. This helped for a while, but when it got cooler outside, the forced air heating system started to turn on. My increased ducting into the room simply dumped more hot air in.
After consulting with an HVAC specialist, we determined that the only viable solution was to add a separate HVAC zone for this room. Since this room may need air conditioning when the rest of the house needs heat, I had a separate 1.5 ton (smallest size available) heat pump installed with a thermostat that automatically switches over from heat to air conditioning as needed.
Special care was taken to prevent added noise from being generated in the room. This was done by acoustically isolating the unit and using large ducts to reduce air flow noise into and out of the room. These were built into the front wall using wood trimmed ducts so that they matched the current wood treatment.